collage

collage

Sunday, May 29, 2016

Update: Jeans Making

I sewed up my Ginger Jeans a good 5 months ago and have only worn them once. I wasn't super happy with the fit, and once I realized that my choice to use regular thread, although easier, meant popping top stitching in places I just didn't feel awesome about them and so they languished in the closet. I came very very close to sending them to Goodwill when I did the great purge of 2016 but I couldn't bear to part with them. They were  lot of work and I had had such high hopes.

Let's go back a bit. I made a muslin and based on that I did some quick and dirty alterations to my pattern pieces. This is my first ever pair of "fitted" pants and so I don't know why I thought it would magically come out perfectly on my first try? Demanding much?!

The sewing of the jeans was not difficult at all, as I knew it wouldn't be. Anyone can sew jeans, you just have to follow the instructions and be patient. Don't expect to make them in one day. Take your time. My fly went in OK, but with no serger my guts (of the jeans) looked kind of crappy. I was lazy, really really lazy while sewing these since I had in the back of my head that they wouldn't fit anyways so I just threw them together. So lazy was I in fact, that when my back yoke didn't line up, I didn't bother to pull out my seam ripper and fix it.. lazy... so so lazy. I guess to my defense we can call it a second muslin and cut me some slack.

So I basted them and took in some width, then I sewed them up and did an ugly hem job (see mad about the unlined up yoke above). I wore them once to a play date with my son, was kind of proud that I wore a completely hand made outfit that day, but I was also a little embarrassed of the jeans.


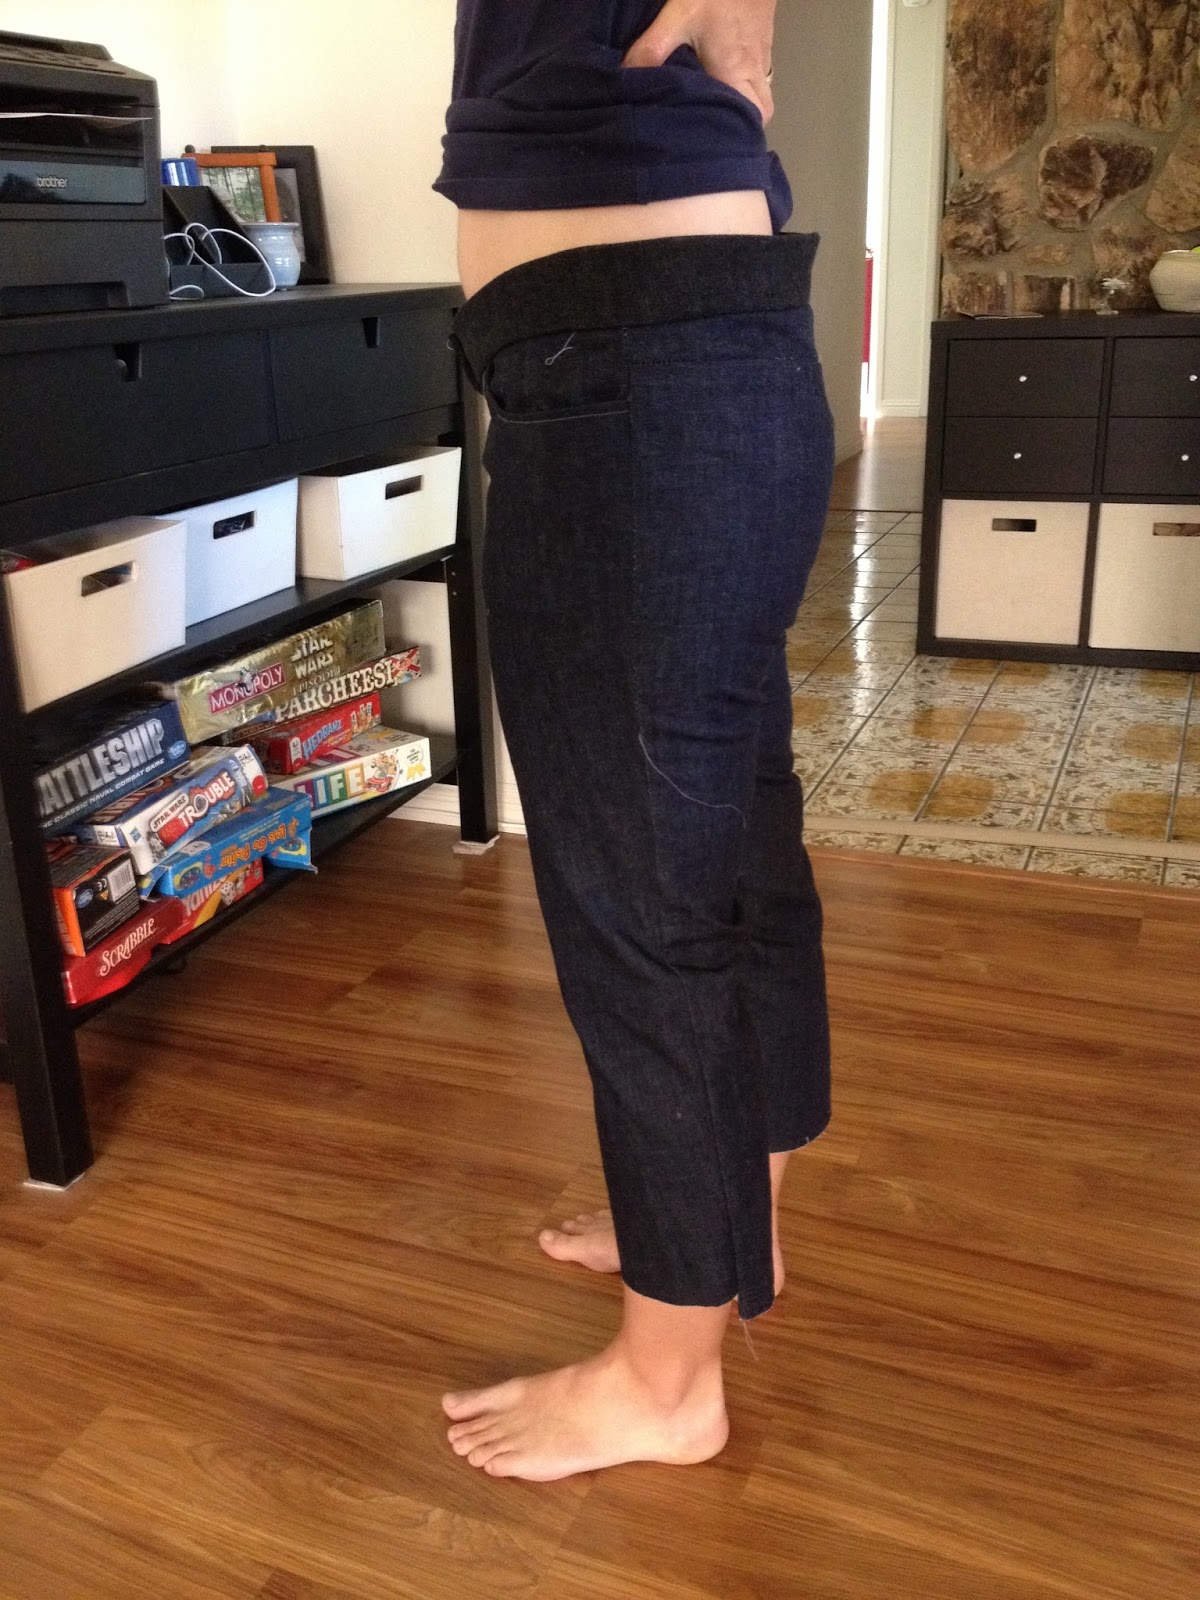
My 8 year old son took these pictures and so it's hard to tell how the jeans really fit. Also they just look like a lump of dark blue. They bagged out pretty bad over the course of the play date and when I got home I threw them in a super hot washer twice and then a super hot dryer hoping that would magically fix all the problems.. haha.. It helped but not enough.


I thought about taking them in and then I folded them up and put them in the closet.. there they sat until today.

Today after hemming a pair of extremely expensive jeans for a friend I realized that even expensive jeans aren't perfect. They have stray threads and wonky top stitching and it's OK.. most people don't notice these things. So I spent a little time on the Internet looking at Gingers and I pulled them back out. I tried them on and realized they fit kind of OK actually. (This probably relates to how many bags of chips I've eaten since December but let's not tell anyone! ) The crotch is still a bit too long and the stove pipe leg was really wider than I want, but other than that they really weren't that bad. So I got out my new serger (yay) and starting at the bottom of the pocket lining I took in the outseam all the way down. Probably took about a 1/4 " off at the thigh down to 1/2" at the ankle. I had pulled out the hem stitches already so I re-hemmed them more neatly with actual top stitching thread since it was already in my machine from the pair I hemmed for my friend.. and Whammo... much much better. Not perfect mind you, but better.

The other thing that had bothered me about them was the uniformity of the color. Most jeans come a bit distressed and that's what I'm used to. So I took out some sand paper and went to town. I put them on and went outside and sanded away on the thighs, around the crotch and some on the shin. Then I took them off and did a bit on the backside all the while being careful to avoid the top stitching. Don't want any more popped stitches than  I know I'm already going to get. They shed blue fuzz like crazy while I was doing this, so I expected the difference to be HUGE!  After all that was done, I threw them in the wash with all my other jeans to get a good toss. When they came out they looked OK. I was not careful about my sanding AT ALL, I just went at it and so it's totally uneven, but I'm OK with that. You can see some color differences. The fit is WAAAAY better now. I'm sure they'll still bag out a bit since this is stretchy denim, but now I consider them to be wearable.  Here's some photographic evidence of that. Please don't mind the crappy pics, I really need to get a remote for my DSLR so I can take better pics myself.
The length is now perfect to wear with flats or sneakers as is. And the leg is tight but not uncomfortably so. 

I like that they give a skinny vibe while still accommodating my more muscular calves. 


Here you can see the distressing. It's not a lot and it's not perfect but now I know that before I sew up my next pair I can hit the denim in some key places with some sand paper. I'll probably have to buy some that's a little heftier than what I used here but I can't wait to mess around with the distressing a bit. 


Rolled up like this is how I'm likely to wear them most often. They look pretty good like this, and now I know that my next pair will fit pretty darn well. 

YAY jeans that fit and are wearable and kind of cute. Far from perfect but after reading Closet Case Files post "14 COMMON JEANS & PANTS FITTING ADJUSTMENTS" I feel better about not searching for THE PERFECT FIT! Thanks Heather Lou for telling me to CHILL OUT! I will, promise. 


Saturday, November 28, 2015

Ginger Jeans... or at least the start of

I purchased the Ginger Jeans pattern months and  months ago and had my husband print it out at work immediately. I knew I wanted to try view A  which is the low rise with stovepipe legs. I figured on me stovepipe is probably as close to skinny jeans as I want to comfortably get since my calves are on the larger size.

The pattern sat in its envelope for a long long time before I was even willing to pull it out and read the instructions.. then finally a few weeks ago I pulled it out and actually taped the pattern pieces together. I don't know what I find so intimidating about it.. I know I can sew jeans, I've sewn 3 or so pairs for my son. But as we all know fitting jeans for an 8 year old boy is a lot less involved than fitting jeans for a woman.. mainly a woman who is long and thin waisted with larger thighs and calves.

So today I figured it might as well give a quick and dirty muslin a shot. I had some denim left over from a pair of my son's jeans (it's stretch denim from Joann's)  and so I cut out short pants and cut the waistband out of a different denim remnant. The funny thing is that these are only a few inches too short even though I folded like a foot out of the bottom of the pattern pieces to fit them on my remnant..

My measurements are as follows:

Height: 5' 9"
Waist: 29.5"
High Hip (2" below belly button) 34 "
Full Hip 40"

Those measurements put me at a size 10 waist and a size 12 hip and leg... not surprising. Just to give it a shot I cut a straight size 12 and then did a super quick and dirty sew up.

Prior to sewing on the waistband they looked rather promising. 

You can see the waist is standing proud of my body a bit

And they are a bit snug across the widest part of my backside but since there's no zipper sewn in yet it seems like a 12 is an ok fit. It's super hard to tell in these dark pictures but I don't like where the yoke seam falls on my booty, I think it would make pocket placement a nightmare. I think if I raise the rise by .75"- 1" it could really help with that. 
Now you can see how weird it is with the waistband sewn on. It definitely needs to be curved more or have the magical "wedge taken out of the back" that everyone in the blogosphere keeps talking about but that I don't have any idea how to accomplish. 

Again due to the snugness across my booty there are pull marks at the crotch.. these really don't hit me this far below my belly button, I think in trying to keep my shirt out of the way I let them fall down a bit. But these photos definitely show that I need to raise the rise up, probably at least an inch would be good. 

I think if I raise the rise up and fix the waist band gap problem they will look pretty good and not  make my butt look as square as it does in this picture.. haha. 

Anyhow, I am going to consider this muslin process a success as now I have a real idea of how to proceed when my real denim arrives. I ordered this Italian Stretch Denim from Michael Levine with a 20% off Black Friday coupon and so I got enough denim for 2 pairs of jeans for less than $30. So even if I totally screw them up I won't be out a lot of money. And I know it can't be too difficult to get my jeans to fit at least as well as these ones I've been wearing. 
Sexy Boyfriend Jeans in a size 8 from Gap Outlet. 

You can see here that the waist and back yoke are so big they sag down and create a bubble on the back. 

And look at this awful pocket placement. I can do better. 

Wish me luck. 

Thursday, August 6, 2015

August already?

And so another summer has come and almost gone. I used to love the end of summer and back to school time, but this summer was different. We had so much fun on our New England vacation that it was hard to see it end, and this summer marks the first since my son was born that I know for certain the end of summer also means back to work for me. It's going to take some serious adjustment. Add to the fun of doing what we want, not having schedules, sleeping till 8 or *gasp* 9, the fact that I'm recovering from the worst bout of vertigo I have ever had and it's going to be a seriously tough re-entry.

But there was knitting… and yarn shopping and it was good.

I worked hard to finish the second Ellafunt in time to leave it on the East coast with its intended recipient.


My step mom and I hit up Halcyon Yarn in Bath and I was surprised that I didn't buy any yarn. But I did get the book Home and Away and I'm looking forward to knitting a few things from it. 


Both Ellafunts were completed in time. 

I knit a pair of wavy stripe socks and made mistakes because conversation in this circle of folks was too fun and I had a hard time keeping track of my pattern. 

But even better than the knitting and the shopping was that distracting conversation and the time spent just staring out at the river and exploring the Maine coast which is near and dear to my heart. Until next time! 


Monday, June 22, 2015

Sometimes it's good to step outside your comfort zone.

I love to sew. In fact I just love to make things, all sorts of things, but I have a confession. I am kind of chicken about making things that fall outside my comfort zone. For years I sewed only square things made with flannel. Then I branched out into square things made with canvas or home dec fabrics. It took years and years for me to try sewing a dress and then another few years for me to try sewing anything with knit fabric. My stepmother thinks I'm fearless, but really I'm not.  And so when my buddy J asked me to "help" her make a tulle skirt for her vow renewal, I quickly said yes before thinking too hard.  She asked me in January maybe, which was really smart of her since it gave me time to do some "research" (read hem and haw and sweat and stress)! No really, I spent hours searching the interwebs for different tulle skirt tutorials. And J and I went back and forth in email and text about what exactly she wanted in this skirt.

We finally landed on this tutorial that was pretty thorough, although I still didn't quite get how all the raw edges were going to be hidden on the waistband until I sewed up a muslin. Now sewers, I can't say this enough… there are times when you can wing it and just sew without a test, and there are times when you must must must sew a muslin. For me that means I can not sew up a new bodice without first testing where the bust darts fall, and I can't sew up a skirt that a friend is going to wear for her vow renewal (!!!) without making sure the length and fit are going to be exactly what she wants. (keep reading to see how sometimes muslins lie!)

Having never sewn a circle skirt before, I started with a tracing paper pattern mock up. J is model tall with very long legs and she wanted the skirt to hit mid calf. That's a lot of skirt. It meant that each panel would have to be 82" x 82" in order to get a circle out of it on the fold with no seams. OK let it soak in for a second, that's 3 layers of tulle and one layer of knit, each 82"x82".  That is a LOT of fabric people.


I mean look at this! I could use that pattern to sew myself a dress and it would still hit me at the knee! 
So J went to  Joann's and bought a butt load of white muslin for us to give it a shot. We tested with muslin that was 108" wide to make sure it would all fit on the tulle J had found and ended up with a very large very white skirt. But it let us know that the length on the pattern was perfect but the elastic had to be tighter, like 5 inches tighter.

After that I set to work.. I realized that my hangup all along was the fear that J would be unhappy with the result. I knew I could do it, but I didn't want to disappoint her and make her have to start from scratch on the hunt for the perfect skirt at the 11th hour.

So one Saturday I started for real, I took a very deep breath and layed out one panel of tulle on the floor and pinned the paper pattern to it and began to cut! Then I cut out the beautiful but very heavy cream ponte knit J had purchased.. and a little nagging voice started talking in my brain. I remember texting J that the knit was heavier than I was expecting.

But I kept going and set to gathering the knit and the tulle and sewing them to the waistband elastic, that I ended up shortening by 6!!! inches.  


At one point it was almost comical how large the marshmallow of tulle was at the sewing machine. And that day we got to try it on for the first time and that's when we knew… muslins can't account for changes in fabric weight… 


The ponte knit was so heavy and the knit elastic we used so weak that the skirt wouldn't stay up where she had wanted it to fall. She had a lace tank shirt that she planned on wearing with the skirt and the weight of the skirt meant it was sitting a good 2 inches short of meeting up with the top. In the photo above we had pulled the waistband tight enough so it was sitting at the right spot, but the result was a rather unflattering bustle at the back. I was starting to worry that I'd have to unpick all the stitching and re-sew the waistband. But after about 30 minutes of staring at it and making notes of the different ways we could fix it, we even joked about having her mother sew her into the dress for the day, we decided to safety pin the shirt to the skirt just for kicks. I really just wanted to see if she could fudge it for the day of, but as you can see it took about 20 safety pins and that would not have worked for a real life wearing.  


The result was pretty spectacular, though, it actually looked fantastic and J said the weight of the skirt actually helped the shirt stay down (it had been riding up a bit without it). So she tested that she could actually slip the whole thing off over her head and VOILA… problem solved. I took the whole thing back to the sewing machine, and sewed the tank to the dress! Instead of separates, J now had a lovely dress to wear for her vow renewal and these pictures don't lie, she looked stunning. 


Thank you J for letting me be a small part of  your special day. I was so thankful that it all worked out and I was pretty proud of myself for stepping way outside my comfort zone to sew with a fabric I'd never sewn with and to sew an item I never would have had the opportunity to sew otherwise. Next time, I'll be sure to use a much lighter knit as the lining! :-)


Tuesday, June 2, 2015

KOOL!!! (aid)

Yesterday I had a hankering to do something a little different. I have been eyeing all the rainbowy speckled yarns around and thought I'd give it a try. I had a little over half a hank of Knit Picks Bare Fingering leftover from some socks and thought I'd go in search of some Kool Aid to give dying a try. I've been put off by the idea of dying because it seemed like a lot of work, and you need special dyes and separate dye pots and…and…and… Too many ands for me! But Kool Aid is available everywhere, and since it's food you can dye in any pot you want to and best of all IT SMELLS AWESOME!!

My local Target only had a few options for me so I just bought one packet of each of the ones they had on hand. Turns out most of them were red. I didn't realize that the color of the drink in his glass on the packet relates to the color of the drink… live and learn.


 Sorry for the blurry photo here but these are the flavors I used. My favorite flavors/colors were the blue raspberry and the orange. I think if I had not had so much water in the pot I would have gotten more speckles and less overall color, but all in all for a first try I think it came out great.


I can't wait to see how this knits up. I'm planning on knitting some short no show type socks to wear for summer. Hopefully there's enough of this to accomplish that. 

And now off to scour the local grocery stores for all the different colors so I can try this a few more times! 

Friday, May 22, 2015

Trillian update

So I just realized that I first wrote about Trillian in August  of 2014! I've been knitting on this thing pretty regularly for the entire year and I am still not finished. I'm pretty darn close but it will probably be a while before it's complete, since I still have a second Ellafunt to finish first.

But I thought that it deserved an update!

It started as this stunning skein of lace weight Indigo Dragonfly Merino Lace Single in the color Beige

I cast on in August of 2014 and had to reknit this tiny triangle 2 or 3 times before I got the super simple pattern correct! 

I've taken it with me to soccer practice, games, Dr's appointments and other random places over the year and it is quite a decent size already. This was it two weeks ago. 

I could probably start the edging at any time now, but I don't want to be left with any of this amazing yarn. I keep weighing the ball to try to get to around 10% of the skein left so I can do the edging.. we will see if that works or not.  I think this super drapey and lightweight shawl will actually be perfect for summer evenings on the coast of Maine, so I'd like to finish it before my vacation hits. Wish me luck. 

Monday, April 6, 2015

There has been quite a bit of knitting

I always think I'll write here again soon… and then months have passed. Life seems to just keep on going and I keep forgetting to update this space with some of the crafting I've been up to. Part of the reason lately is just the simple fact that I started working again. Ever since my son was born I've been home with him full time, but he's 8 now, and in the 2nd grade and it seemed the right time to start dipping my toe into the world of work again. I chose to take a small job on at my son's school so it's only about 3 hours a day, and I think it was the perfect way to start back, but it still means that I'm working most all of the hours that my son is in school. I'm working on readjusting to having to do things like grocery shopping on the weekends or with my son along for the ride.

But I digress yet again. While all of the above was going on I was still knitting every evening. And I've got two new sweaters to show for it.


The first had been in my Ravelry queue for years. I'm not sure what had me waiting. I'd had the yarn for it for a long time too. It was a fairly straight forward knit. I was worried that the collar seemed confusing or difficult but in reality it was pretty easy, just all that twisted rib took FOREVER!! Here's my new favorite sweater, Larch…


I've been reaching for this one a lot lately. The color is kind of a pinky grey and it just seems to go with everything. I also like that since it's an open cardigan it's not too hot for our weird climate here, but it helps take the chill off. I absolutely love the buttons I got for it at Stitches West from Jennie the Potter! They were the exact perfect choice!

The second sweater is Lifesavers by Tanis Lavallee of Tanis Fiber Arts fame! I saw her post a pic of the version she made for herself on Instagram and fell instantly in love. I kind of hounded her blog hoping she'd release a pattern for it and she did one better than that. She released the pattern and special kits to make the exact sweater she'd made. I had a little out of body experience and promptly ordered one! When I was in twisted rib collar hell on my Larch I spent one afternoon winding yarn for Lifesavers knowing I'd be casting on the minute Larch was on the blocking board and that is exactly what I did! And man was I crazy, I knit a fingering weight cardigan in a month.. that's a record for me. 


And I know it will be one of my favorite sweaters for the warmer months. It's the perfect weight to throw on over a t-shirt when there is a breeze or when it's cooler in the shade. 

And I have to share this photo because it makes me look way awesomer than I am in real life. A few weeks ago I 'ran' the She Is Beautiful 10k for the second year in a row. I say 'ran' because I only ran about 1 of the 6 miles and walked the rest. I keep wanting to say I'm a runner but I have this loud and very animated argument in my head every time I try to run for more than 5 minutes at a time. So during the 6 mile run I ran about 5 different stretches of no more than 2 minutes at a time, but this photo sure makes it look like I rocked that run! HAHAHA


Happy Monday! Now go knit something!